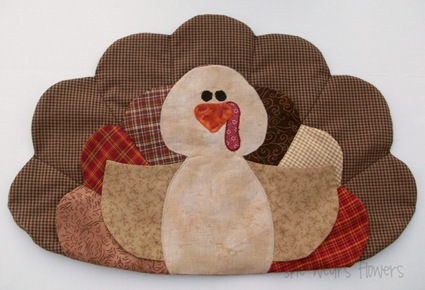
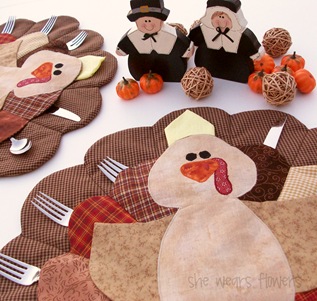
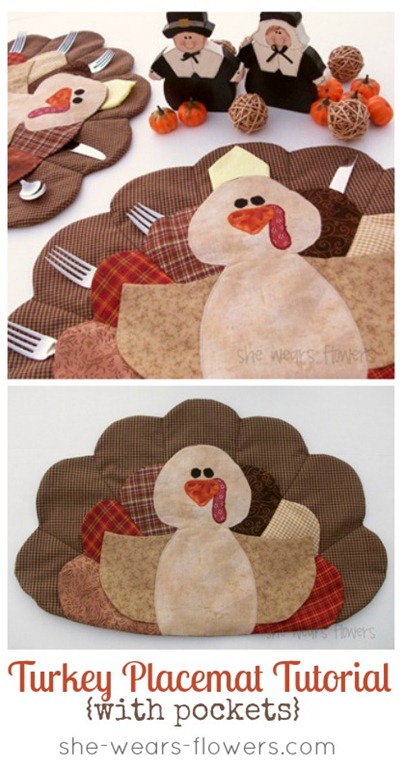
Wow! I am giddy with excitement to be on Ucreate today. I am Tammy and I started blogging at She Wears Flowers to have a reason to work on the stuff I really want to do and avoid housework at all costs. I love to sew and craft and have enjoyed blogging as a way to keep a record of the things I make and provide a resource for others. Today I am going to share my turkey placemats with you. These are similar to the ones Pottery Barn sold several years ago. It’s a cute little turkey that has pocket feathers for the silverware and napkin. Perfect for children and fun for adults, too!
Supply List: NOTE: Measurements are for one placemat.
- PATTERNS <—found here.
- thread – dark brown, light brown, red, orange, black, invisible (clear)
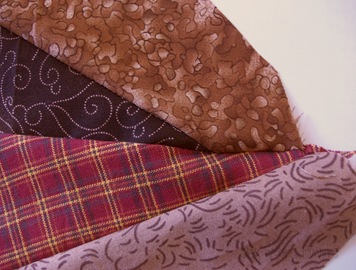
- fabric – (100% cotton fabric works best) multiple scraps for feathers, scraps for facial features, tan for body (6 x 12 inches), tan for wings (12 x 12 inches), fabric for backings (3/4 yard)
- low loft batting *1/4 yard double-sided paper-backed fusible webbing (Heat ‘N Bond Lite)
- lightweight iron-on stabilizer for applique (6 x 12 inches)
- straight pins
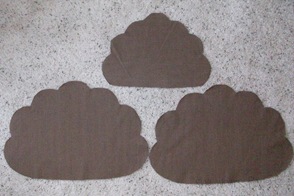
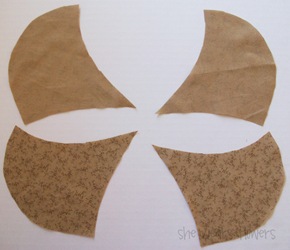
Instructions: Preparing your pattern and cutting the pieces Print out pattern pieces. Each page a small scale showing one inch so you can check to make sure the page is printing the right size. Be sure to chose “None” at the Page Scaling section. Cut the eyes, beak, wattle and body on the lines. Cut around the wings, feathers and center section so you can separate these pieces from each other. Put the backing pieces together by connecting the pages (tape them together) as you match the stars and letters together. It is a bit confusing, but very do-able! Start with the small backing piece which is only 2 pages. The large piece is made out of 4 pages. Tape together really well. Each backing piece is only half of the pattern. Fold your fabric in half (right sides together or wrong sides together) and place the side labeled “Place on fold” along the folded edge. Cut out the pattern piece and the fabric. Do this once for the small backing piece and 2 times for the large backing piece. This is what you should have when you are done cutting your backing pieces:
Using your pattern pieces as a guide for the size, cut out fabric rectangles for the turkey body, beak, eyes, and wattle. Do not cut the shapes out of your fabric yet.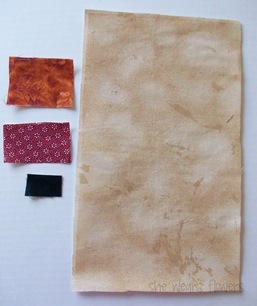 Adhere the double-sided fusible webbing to the wrong side of the fabric pieces according to the manufacturer’s directions. Trace the pattern pieces onto the paper.
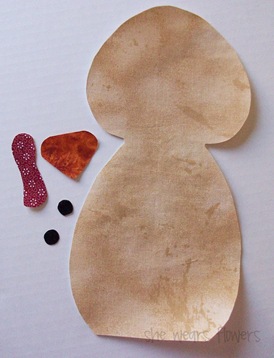
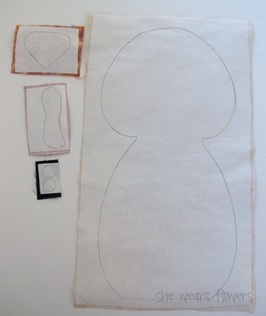 Cut out the body parts and set aside.
 With right sides together of the wing fabric, cut out 2 wings at a time. Repeat so you have 4 wing pieces.
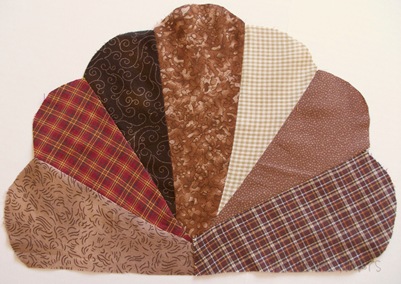
 Use the pattern pieces to cut out the feathers and center piece. It is very important to keep them in the right order with the top of each feather at the top and the left and right sides correct. You will cut the left feathers with the pattern piece facing up and then flip it horizontally (writing is facing down but the top of the piece is still at the top) to cut the right side feathers. I laid my feathers in order—from 1 to 3 which is from the bottom towards the center on each side–as I cut them out so they didn’t get mixed up. If you are cutting feathers for more than one placemat at a time, this gets a little confusing so be sure to match them up to the pattern pieces to check for correct order and placement.
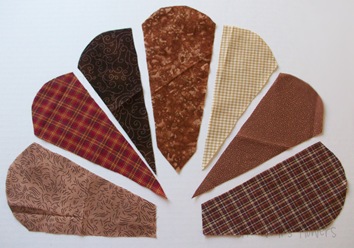 Cut a piece of batting in the rough shape of the large backing piece. It does not have to be exact, but be sure it is not smaller than the backing piece. Cut a piece of stabilizer a little larger than the turkey body. I just cut a rectangle and trimmed it when I was done. Some people do not use this because you are already using fusible webbing, but I swear by this step. It really helps a lot! Sewing the feathers Using 1/4 inch seams, sew the feathers together one at a time. I have found that it is easiest to flip the lowest feather over the next one (right sides together). Sew these two together.
 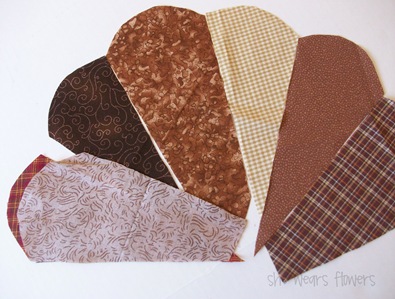 Open the feathers you just sewed and place them back in order. Then flip them back up and “grab” the next feather the same way you did the first. Sew these two together. Do not worry about the points being longer on some feather than others. It all works out. This method seems a little uptight and crazy, but it is really easy to get the feathers all mixed up and then they don’t fit together properly. I have found that this is an easy way to get them sewn together the right way.
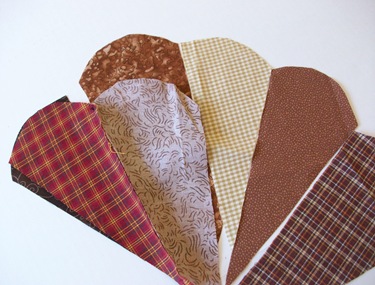 When you get to the center feather/section (which really doesn’t show so it doesn’t matter what color your fabric is), you will need to sew it along the length to the preceding feather. Then the little point at the bottom left will be sewn to the protruding tip of the second left-side feather.
 Add the next feather (right side) by sewing it to the length of the center section. Sew the center right side feather to the previous one and then sew the protruding tip of this feather to the little edge of the center section. This sounds a little confusing, but it makes sense as you are sewing. The whole thing fits together like a little puzzle. When your feathers are sewn, the bottom center of each side will be open. Lay one side over the other. This will not show. You could also sew these sections together in the center, but it really won’t matter. Iron the seams open and clip if necessary. It tends to get a little thick where the points meet and clipping will help everything to lay flat.
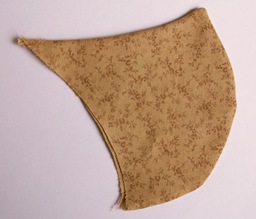
 Sew the wings Put two wing pieces sections together with right sides together. Sew along two sides according to the pattern piece. Clip the curves.
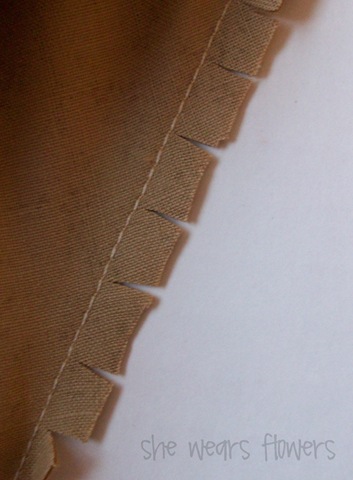 Clip the corners off and trim the seam allowance to 1/8 inch. (The clipping is still there, it is just hard to see.)
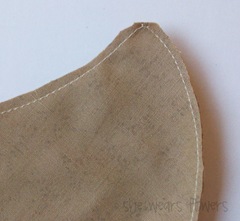 Turn right sides out and iron flat.
 Sewing the body and wings onto the feathers Iron stabilizer on the back (wrong) side of the feather section.
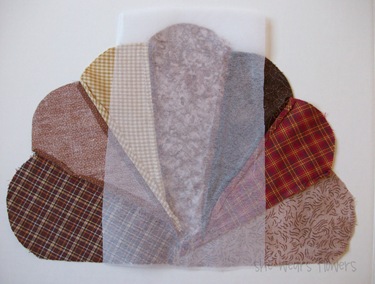 Remove paper from the body section. Center body section on the feathers. Tuck the wings in place along the sides of the body. (Yep, I forgot and had to pick out the applique stitching hence the reason there is no picture of it-sorry!) Be sure to leave 1/4 inch of the center feather section exposed around the head. Iron body and wings to the feather section following the manufacturer’s directions on the fusible webbing. You may need to pin the wings in place since there is no webbing under them.
 Change your stitch setting to a zig zag stitch. The length should be a very small number—almost O—and the stitch width will be 2 or 3. You will applique using a satin stitch which is basically a very close together zig zag stitch.
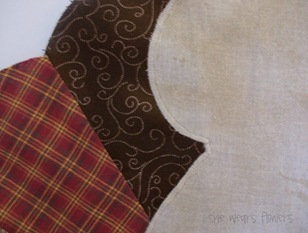
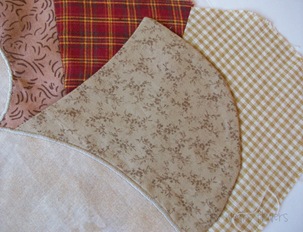
Iron on the eyes, beak and wattle to the body section. Be sure to tuck the wattle slightly underneath the beak and be sure it is at least 1/4 inch away from any edges. Applique in place in the same manner as the body section using matching thread for each piece.
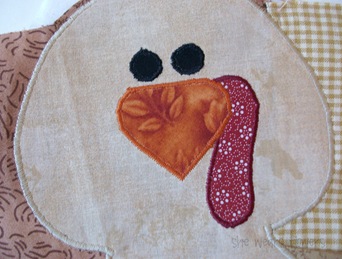 Sewing the small backing to the feather section Lay the small backing piece over the turkey/feathers with right sides together. My backing fabric is the same on both sides so it is tricky to see. Be sure to tuck the wings to the inside so they stay out of your way. Pin in place so it doesn’t move around while you sew it.

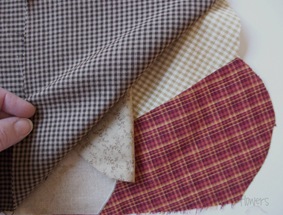
Leave a large opening at the bottom for turning.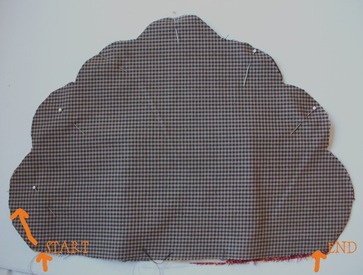 Sew using 1/4 inch seams and be sure to sew around the applique stitch when you are sewing around the head. Sew with the backing side down so you can see where you are going as you sew.
 Also be sure that you pivot around the curves at the seam lines. (I forgot about this and had to go back and fix it which is why you can see an extra stitching line in some of my pictures. ) Clip a V shape out of the inside of each set of curves. This will help it lay smooth when it is turned right side out.
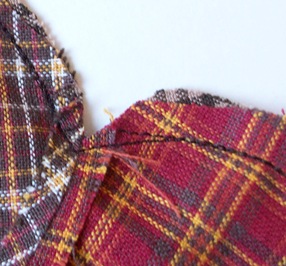 Turn right side out and iron flat.
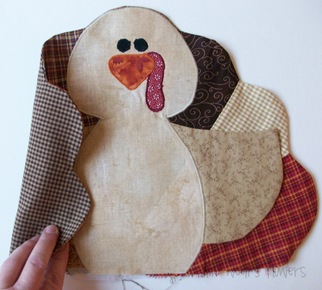 Sewing turkey to large backing Make a “sandwich” with the turkey section/batting and the backing sections. The turkey section will go face up on one large backing section. (Wrong side of turkey on top of right side of large backing piece.) Place the second large backing section on top of this part with the right sides together. Lay batting on top of the whole thing. Check to make sure the edges are lined up carefully especially at the bottom. Trim as necessary.
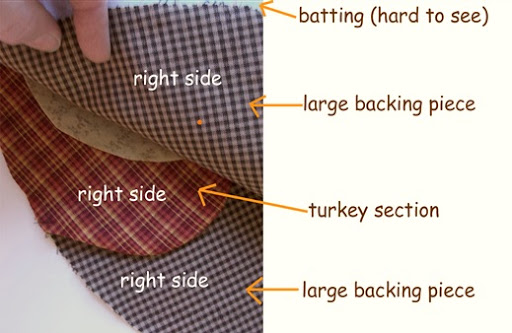 Carefully flip the whole thing over so that the batting is on the bottom. Pin together.
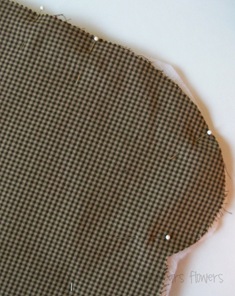 Using a 3/8 inch seam along the bottom and a 1/4 inch seam everywhere else, sew along the edges leaving the bottom edge between the two arrows open. (The opening is basically the body section if that helps.) Measure the 1/4 inch seam from the edge of the fabric–disregard the batting.
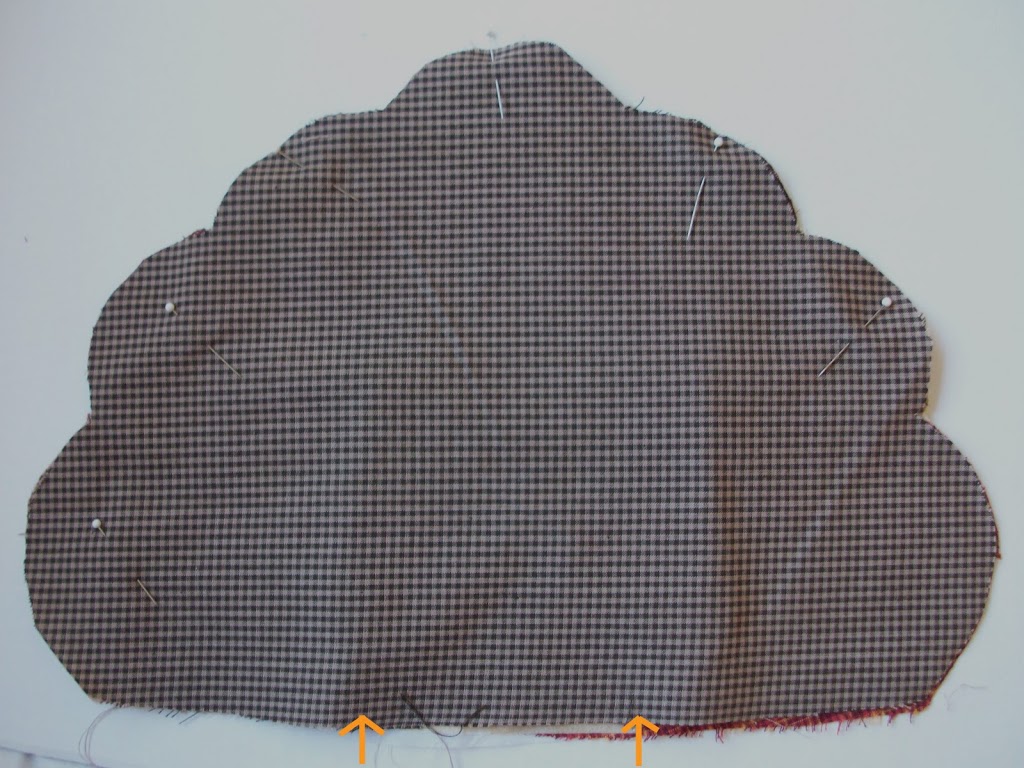
Trim the batting even with the edges of the fabric. Clip the spaces between the “feathers” as you did before.
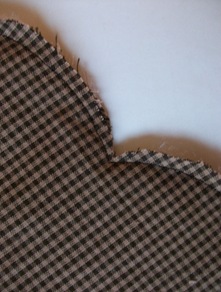 Carefully turn the turkey right side out bringing the turkey and pockets section out and leaving the batting inside. The turkey section will be hanging. Just pat it all down in place on top of the large backing sections. Iron the large backing section smooth. Turn the edges from the bottom opening 3/8 inch towards the inside and iron in place. The turkey body part will be stiff and thick from the webbings.
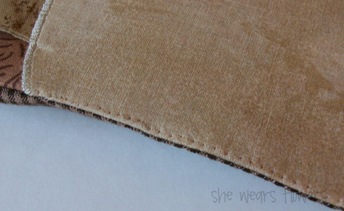
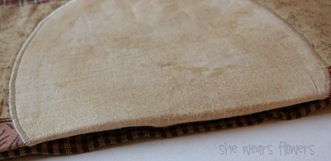 Sew the bottom opening closed by hand. I used invisible (clear) thread since the top layer is light colored and the bottom layer is dark. Otherwise, I probably would have taken the easy path and sewn it on the machine!
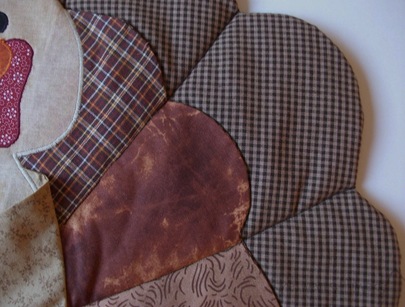
 Sew lines from the middle of each “feather” on the large backing piece down to the turkey body. The lines on the center section will only go to the top of the head, but be sure to catch the head/center feather section in your stitch. I sewed over that tiny part several times to reinforce the stitch since this is all that is holding the pocket down on that section.


Nice and fun
Mari
This is WAY too cute! I live in Canada, so thanksgiving is over already, but definitely on my list for next year! Thanks so much!
wow, this is super adorable!
wow her stuff is always very cute. I love her blog
This is adorable, and SOOO creative! I love it!
Too cute! I’m working on something similar. Great minds think alike!!!
I have a pattern very similar to this, but I like this one a lot better.
The pattern link isn’t working for me though=(
I want to make one but the pattern link does not work! It looks like the pattern lives in Google Docs, which external users do not have access to unless you invite them. Help!
🙁
link doesn’t work
Oh YIKES! I am so sorry for the inconvenience regarding the PATTERN DOWNLOAD. Please copy and paste this new link into your browser to download the pattern pages:
https://docs.google.com/viewer?a=v&pid=explorer&chrome=true&srcid=0BxmO5n0wDHe-MGIyY2I1NzMtODBlZC00NDE0LThhMDktMjYxNjk1NjM1NGRj&hl=en&authkey=CJuY7_kE
cool thanks! I can’t wait to make some of these. Now how many to make that is the question…hmmm
Oh my goodness I am so making these for this year 🙂 Thank you so much!
I for some reason can’t get either link to work, I will try again later though, because I definitely want to do these!
Nevermind, I got it to work, and I am SO excited!!!
I love it, it is simple but really cool – i can’t wait to get started.
Good fun!
Amei! Thank you!
kiss
How adorable! I am in love with these cute placemats!
This rocks! I want to make a whole set!!!
These are so cute! LOVE them!
Tammy,
All I can say is, thank you, thank you, thank you! I LOVE this pattern! I just got done sewing four turkeys, they are so cute! Your directions are great…I love your little hints and tidbits, very helpful. I just took my time, but after cutting out the pattern pieces I was afraid I’d taken on more than I could chew! Let me say, I HATE sewing…I have no patience, but after the first day they started to come together and “look” like something. I followed your directions to a “tee” except for two things. First, I appliqued the facial features just to the body part, before I sewed it to the wings…I figured it would be less bulky and easier to turn while zig-zagging. Second, I just sewed the two large backing pieces with the batting together, leaving a portion open at the bottom, turned it out and stiched real close to the edge, then I attached the body at the bottom…it was easier for me and they turned out great. The “sandwich” part scared me, I was afraid I’d mess it up and it was much easier to sew the two backing pieces with a larger piece of batting, then I just trimmed the batting away once they were sewn together. I don’t know if this make any sense, but it worked for me! I love the placemats, and again than you so much!!! : )
Hello
I have tried numerous times to download the instructions for the turkey place mat and have not been successful. I was able to get the pattern pieces. Could someone help me.
Thank you
Hi Jan,
I went above and fixed the link, it should be working now. Thanks for your comment.
I know it’s been a long time since anyone has commented on this, but the link does not work, it says I have to request access. I have been seeing this on Pinterest for a bit, but am unable to find the pattern ANYWHERE!!! CAN SOMEONE PLEASE HELP ME??? I REALLY LOVE this and would love the chance to make some for my family! Thank you so much! Sam
Hi Samantha! I found the file! The link is now fixed and directs you to the pattern! Thank you for reaching out!