Hi! I’m Jill from Made it on Monday and I’m so excited to be here today!
My blog is all about crafting, sewing, creating and inspiring, but mostly sewing. I have a tendency to fall in love with clothes but not their prices. So one of my hobbies is pouring over pictures of name brand clothes and then coming up with a way to recreate them. I started my blog when I was working part time and the mom of a new baby, desperately needing a new way to express my creative side. I’m now home full time with my two-year-old and excitedly looking forward to a new baby this October. The blog-related constant through these life changes has been that my projects need to be quick and simple. The bulk of what you’ll find can be made in one day.
The Petal Top Tutorial
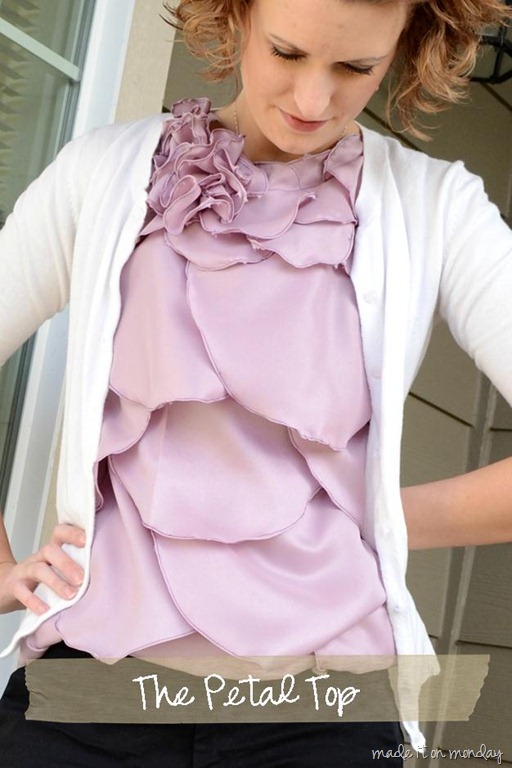
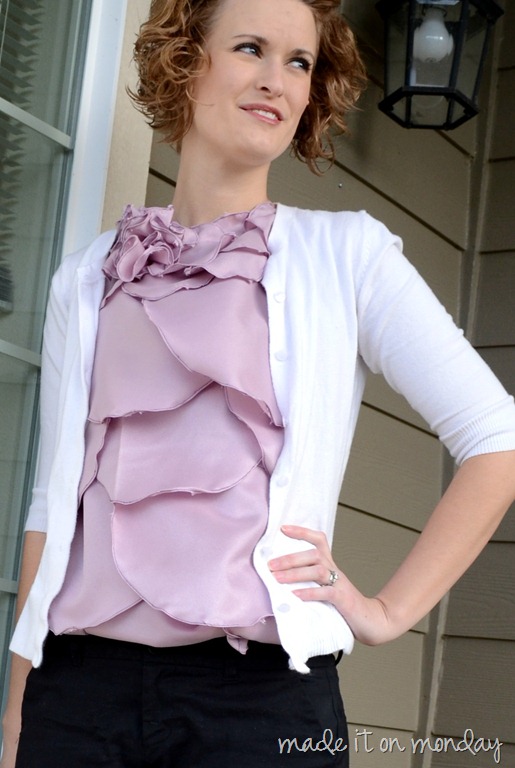
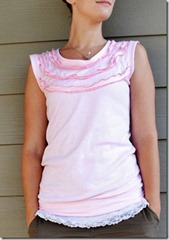
The Petal Top is a knock-off of the Ann Taylor Georgette Petal Top which retailed for $88 when it was available. I first discovered it over at The Chloe Conspiracy. You can make one as well, for whatever you’re willing to pay for two yards of fabric.
It really was a simple top to make with the most time consuming aspect being the petals.
My favorite element of it is the corsage-like cluster of flowers at the neckline.
Want to make one yourself? All you’ll need is two yards of fabric and thread. I used a soft, somewhat flowy material from a bolt my mother-in-law found at a thrift store. Anything thin or sheer would work well.
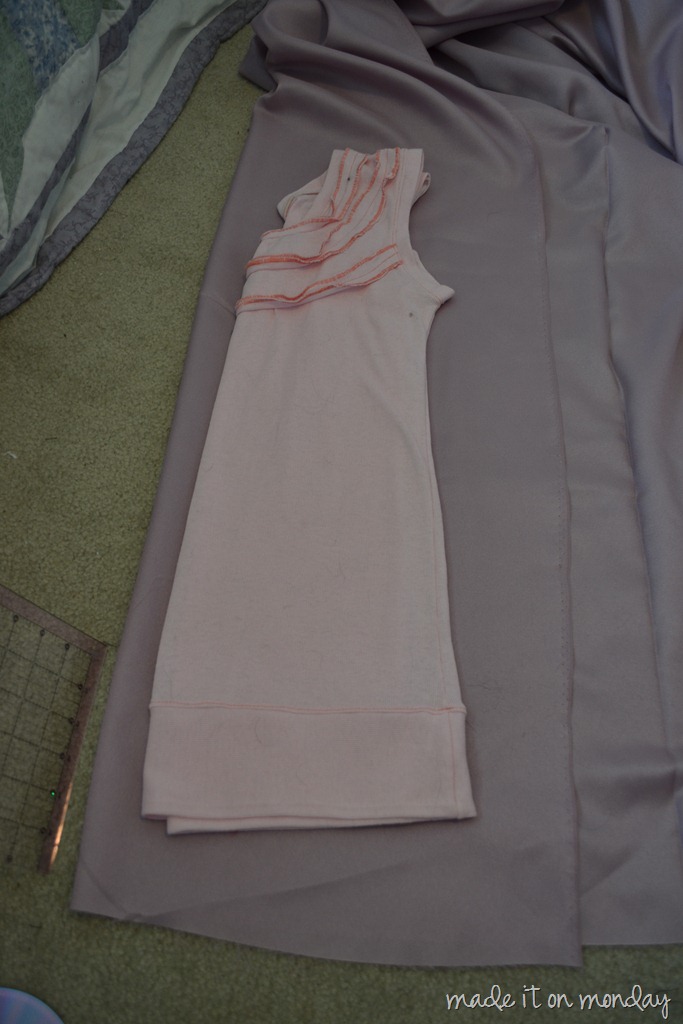
I started by using a tank that I like the cut of as a pattern. Since my material didn’t have any stretch to it, I made sure and set the existing top in from the fold about an inch, and then cut an extra inch outside of the top to make sure I had enough for seam allowances. I then used the cut out front as the pattern for the back (to be sure my shoulder widths and arm holes matched up), but narrowed it by about an inch and a half since you don’t need as much material in the back. I kept my neckline high in the front and even higher in the back.
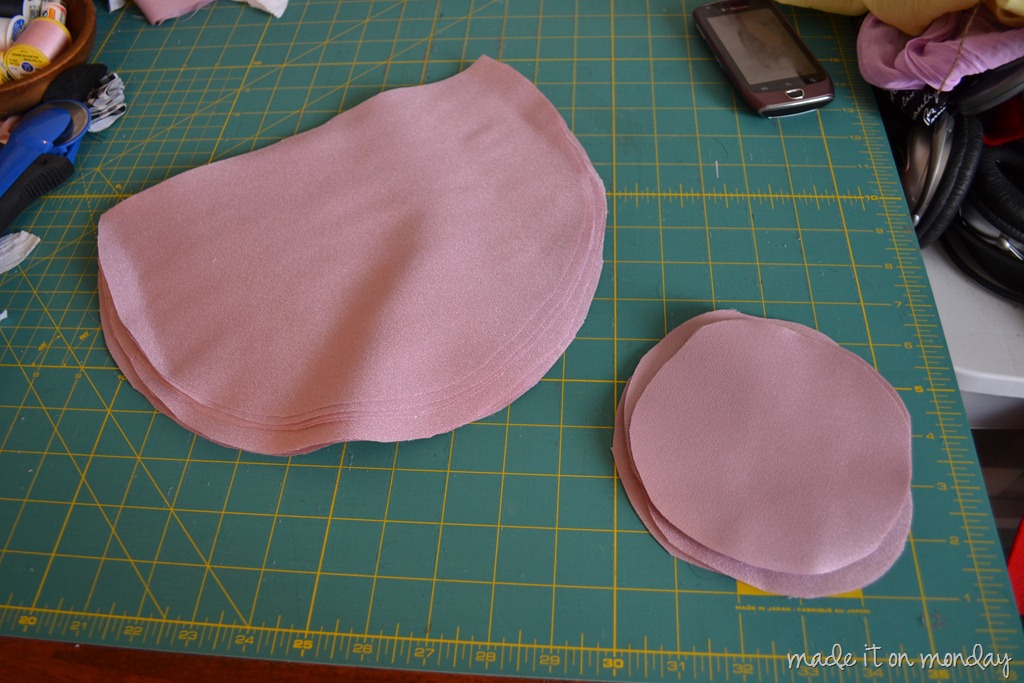
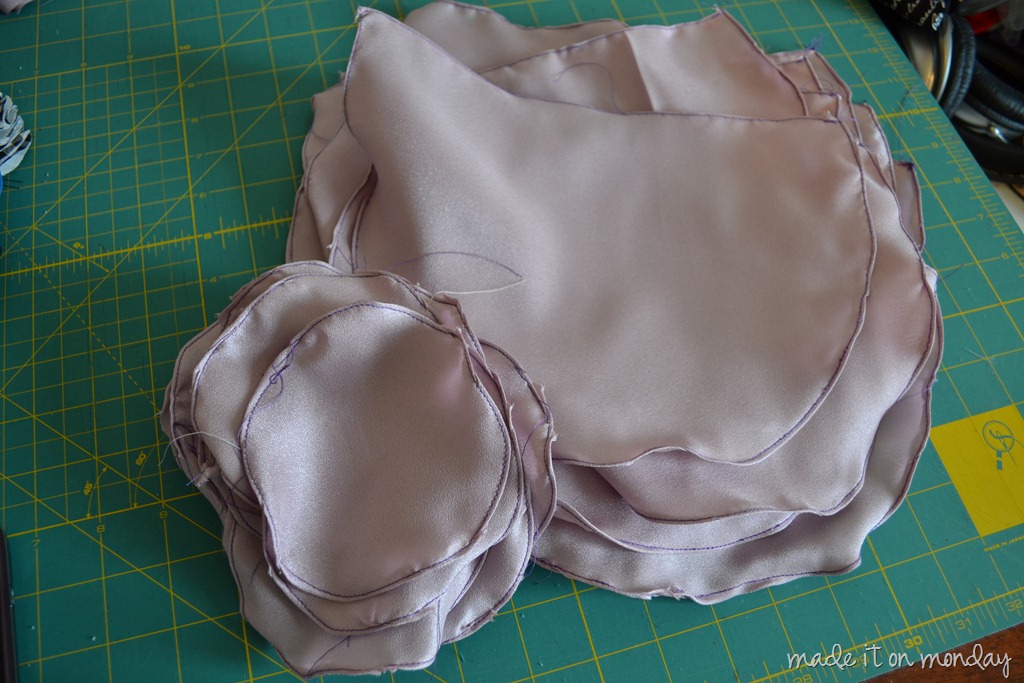
The next step was cutting out the petals. You need to keep them big. You can see from the pattern sitting on the front of the shirt just how large the petal is in comparison to the shirt. I originally made another top and used a CD as the pattern for the petals. Big mistake. I now know how to make a Big Bird looking costume. Perhaps if I had intended this to be The Feather Top rather than the Petal Top…
After carefully studying my inspiration picture, I noticed that there were about 15 large petals on the front of the shirt, and about 15 more small petals. I cut out 16 large ones and ended up having a few left over. For the small petals, I did use a CD as my pattern and kept them exact circles, and cut out 18 of them.
I then used my rolled hem foot to finish off all the edges of the petals since my material frays a lot. If you aren’t familiar with a rolled hem foot, you can check out my tutorial on using one HERE. It is seriously my favorite sewing foot. Using the rolled hem around the curves was a little tricky, but I eventually got the hang of it.
Once all my petals were finished, I started laying them out on the right side of the shirt front. I layered three for the bottom row and pinned them down.
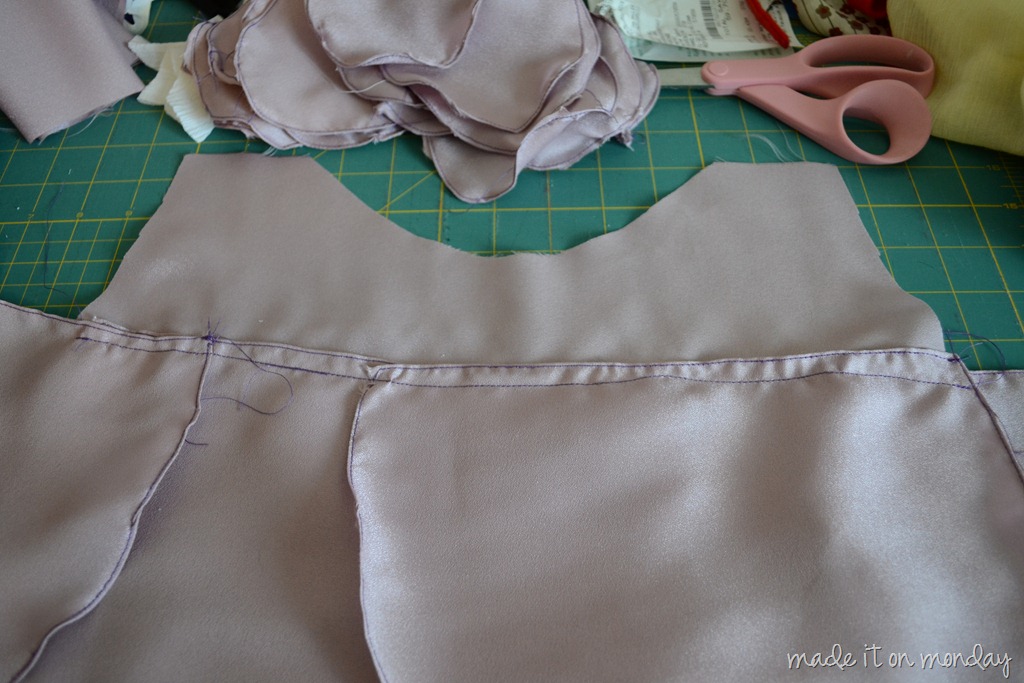
Then sewed along the top in a straight line. Then I pinned the next layer down, making sure there was plenty of overlap so the stitching line would be hidden, sewed it down, and continued this way until I had four rows, or up to just above the bust line. If half of a petal ended up hanging over the edge of the shirt, I simply cut it down the middle and used the other half in another row.
You can see in the picture above where the last row of petals was sewn on.
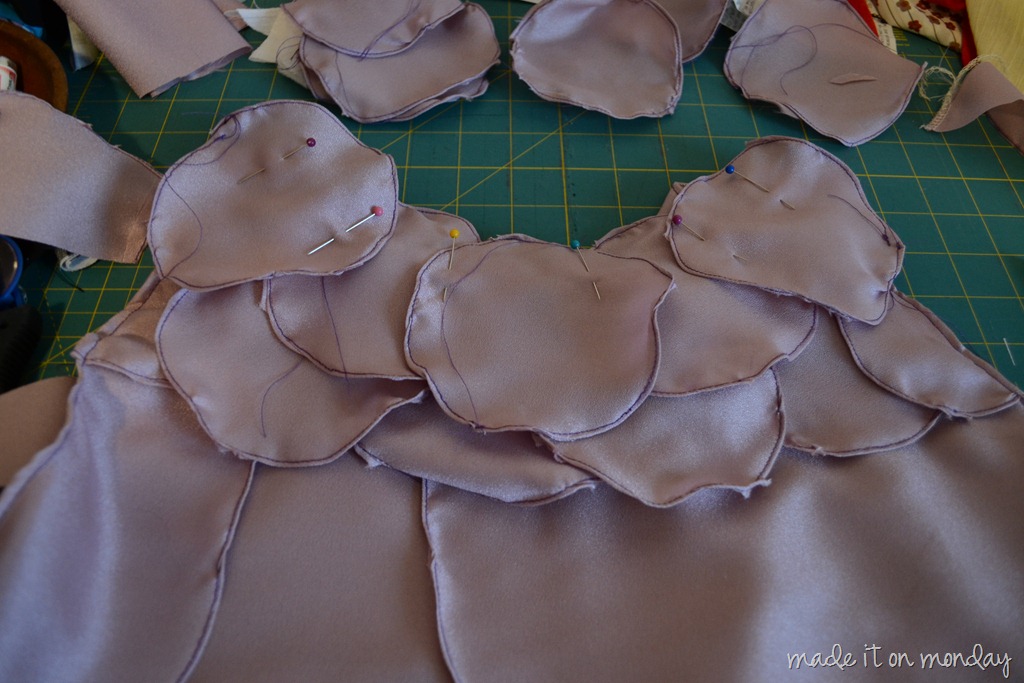
I then pinned down a row of the small petals and sewed them to the shirt. All remaining petals and flowers wouldn’t be added until after the shirt was constructed.
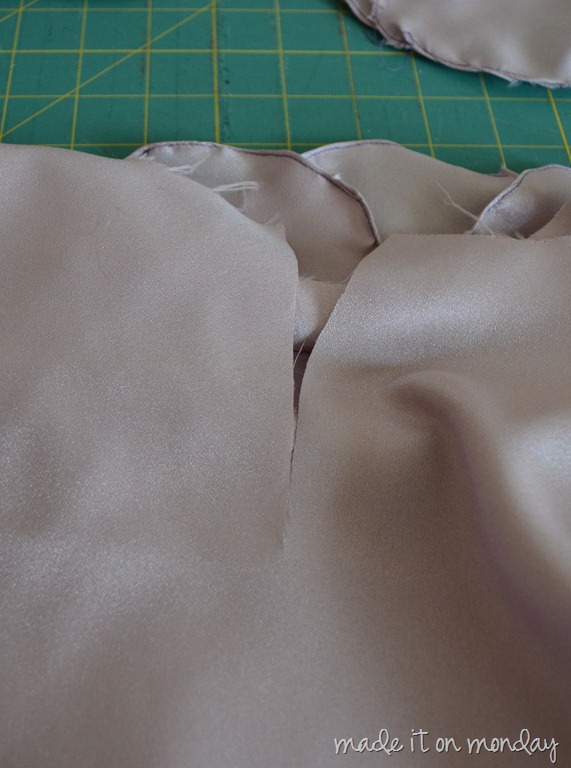
Because my fabric doesn’t stretch at all, I needed to add a slit to the back so I could slip it over my head. Then the shirt was simple to construct by sewing the back and front, right sides together, at the shoulders and then side seams. Once all your seams are sewn, trim off any excess petal. I then hemmed the top and finished off the arm holes and neckline by first serging my raw edges and then folding them in and sewing them down. If you don’t have a serger, simply do a double fold to hide the raw edge and sew.
I finally added the last row of petals from one shoulder seam, around the neckline and to the other shoulder seam, with about a quarter inch of the petal extending above the neckline. They were sewn down (this line of stitching is exposed). My hope is that as I wear the top, the top part will fold over the stich line.
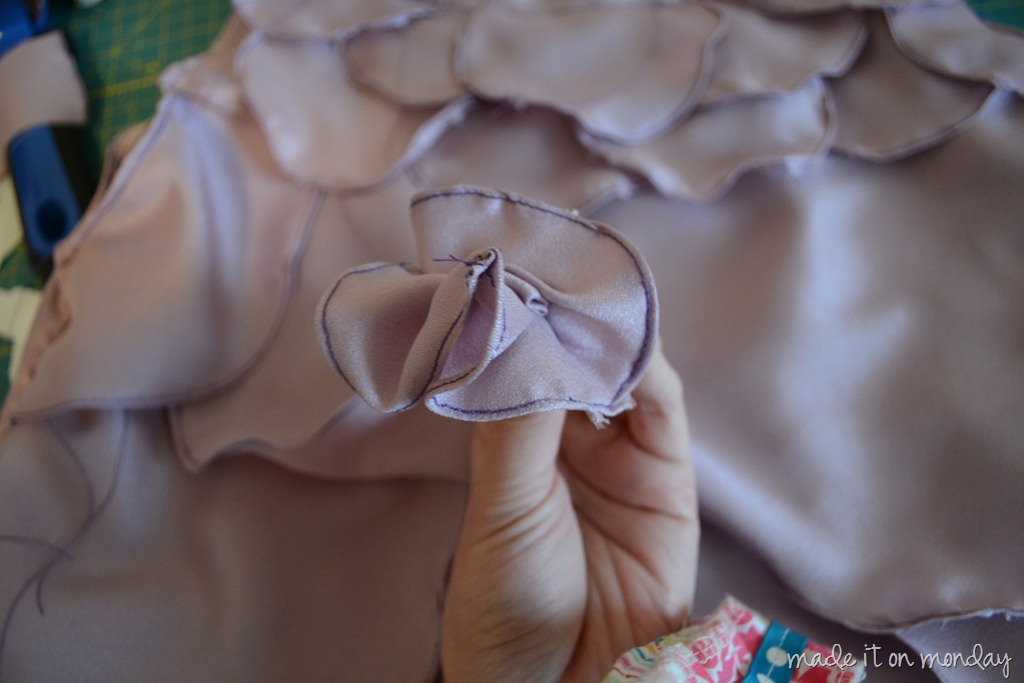
And the final step—my favorite one—was adding a cluster of flowers.
I used my remaining small petals (about six of them) and simply pinched the circle in the middle and pinned it down. I clustered them together and then just did a small amount of stitching to the center of each one to hold the flower in place.
I love the way the top turned out and am so excited to bring a little spring to my wardrobe with it! If you make one, I’d love to see it too! Just stop by and let me know.
Thank you so much for having me today, Kari! I loved being here!
I’d love to have you come visit my blog, check out what’s inspiring me on Pinterest, or take a look at my Etsy shop, Ruffles ‘n Such. But for now, I’m excited to share with you my latest sewing project.
Jill has amazing sewing skills and check at these beautiful ideas over at Made It On Monday, too…
Also find Jill here:








I LOVE Jill and her adorable designs! Beautiful top once again, Jill–it’s so gorgeous!
Me parece monisimo y facil
gracias por compartir
So adorable!
thanks so much for posting this tutorial! i really want to try it out! 🙂
SO cute! Also, in case anyone hasn’t thought of it, this would make a fabulous nursing shirt! Just cut slits or holes in the bottom layer and maybe put something to keep the petals down. Thanks for the tutorial!
GORGEOUS. Love Jill, love her blog, so excited to see her on here!
Me encanta tu blog! lo miro siempre!
Sos muy habilidosa!
Felicitaciones por esa blusa hermosa!
Besos desde Argentina.
Gaba♥
Harika olmuş:)
This is absolutely gorgeous! It looks like it came right out of an expensive boutique!
I feel like this top would over-emphasize my bust, but it’s adorable on you! A little bit jealous 😉