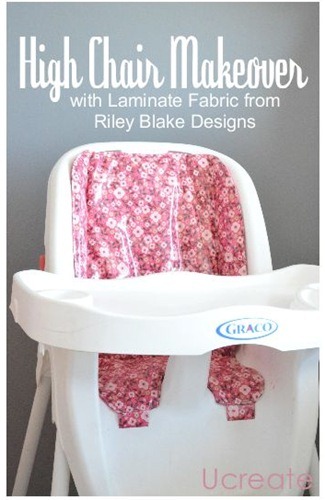
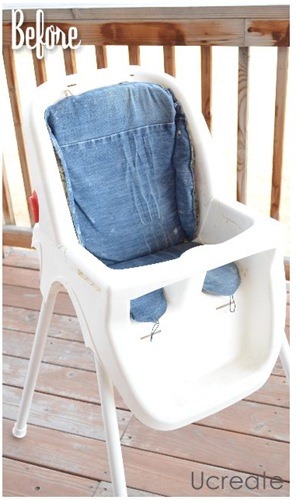
You know how when a high chair is handed down from child to child and it starts to look pretty nasty. The padding gets worn, the belt straps are not even worth saving, but your child still needs a high chair. Here’s a great way to breathe new life into your old high chair…{not to replace Mr. Clean Erase and bleach! }
A couple years back I created a high chair pad that I could just throw in the washer when it got dirty…which was EVERY time the child ate in the high chair. Problem: I hate laundry and the thing is a bugger to put in the washing machine. So, I wanted to try again using the perfect solution.
NOW FOR THE PERFECT SOLUTION: LAMINATE FABRIC
This fabric is amazing to sew with and easy to clean up. Grab a wet rag and wipe it down. This fabric is also not sticky and plastic feeling. It’s actually incredibly light. I cannot say how much I love this fabric. It’s amazing!
LET’S GET STARTED:
SUPPLIES:
2 yards of your favorite Riley Blake Designs Laminate Fabric
some nice cushy batting
old high chair seat pad
essentials with which you sew
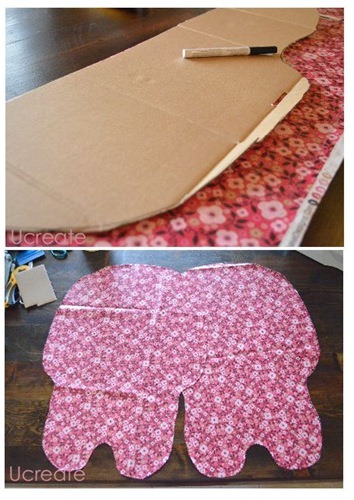
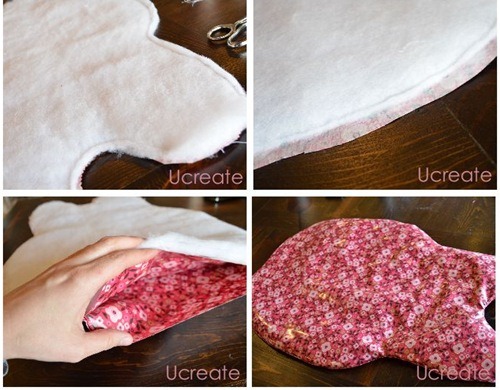
STEP #1: Grab that old nasty seat pad and trace around it adding an extra half inch for seam allowance. I only traced half of it and put my newly traced “pattern” on the fold of the laminate fabric. Open it up and you have a FULL high chair seat pad… make sense? Cut two pieces: front and back.
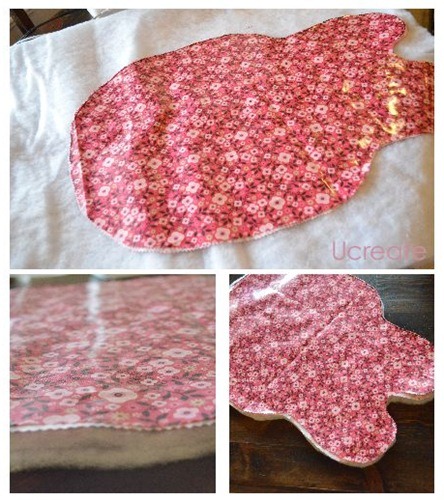
STEP #2: Lay one of your seat pieces on your cushy batting and cut out one piece to go between the seat pad.
STEP #3: Put right sides together and the batting on the bottom; pin all the way around…leaving open spaces for the little straps that will hold the pad to the high chair. {I am really not sure how to word it, but see step #5 if you are really confused…like I would be}
Step #4: Cut the batting to the seams. {This lessens the bulk.} Turn the WHOLE thing right side out.
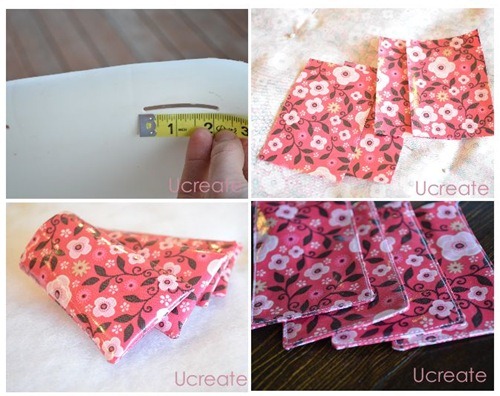
STEP #5: Let make the straps that hold the pad in the chair. Because each high chair is different you will have to modify these instructions to fit your chair. First, measure the slits (mine were 2”). Cut 8 strips at 2” x 3”. Take two pieces, with right sides together, sew around 3 sides. Turn right side out and top stitch 1/8” around the three sides. {Repeat with other strips until you have 4 clean and pretty top-stitched pieces}…I really hope this is making some kind of sense.
Step #6: Put the pad in the chair to make sure it fits correctly and let’s add straps. Pin straps in seat pad.
STEP #7: Turn the raw edges {where the strips are} in 1/2 inch and PIN REALLY GOOD! Now top stitch around the WHOLE seat pad 1/8”. I backstitch where the strips are in order to hold them in super well.
My high chair has these little tabs where the strips hook on so I created button holes with my sewing machine in order to latch the strips on nice and tight.
STEP #8: Determine where the seat pad will fold and sew straight lines there to make the seat pad fit better. It’s best to use your previous pad and use it to mark where you will sew these final lines. I used invisible thread to sew on the outside of the pad.
{NOTE: My little one doesn’t need the belt to hold her in, but if yours does, I would sew button holes in the seat pad where the belt will go through. Easy as that!}
And your HIGH CHAIR MAKEOVER is complete!!
Post By…




Ooh I love this!!
It is lovely! I am also going to chair the pad on my highchair since it was my little man’s and now that I have a little girl, I have to change it into something girly. 🙂 Love it!
If the brand (Graco) sees what you did, well they’d ask you to work for them!
great job! I adore it ^^)