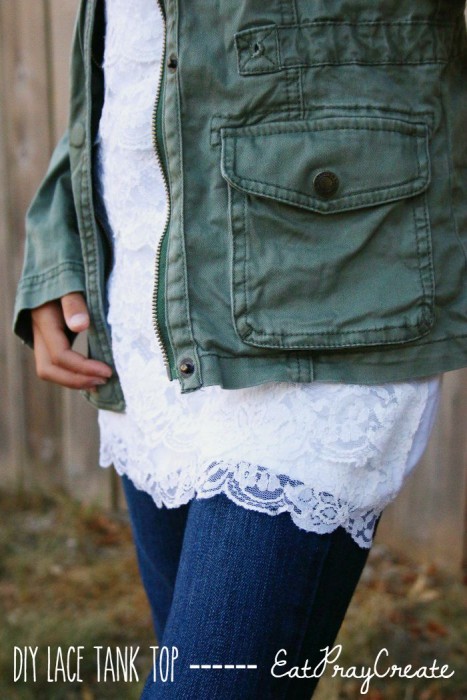
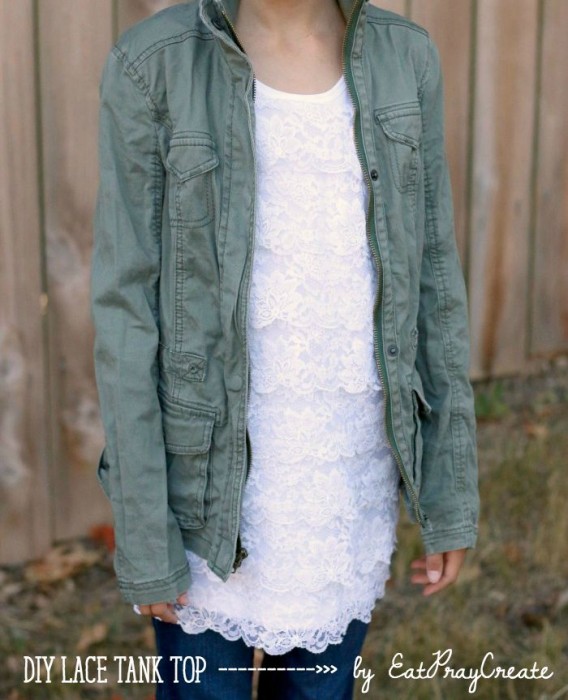
Hi I’m Taya, creative mommy to 5 cuties and blogger over at EatPrayCreate.com where I share DIY crafts, tutorials, recipes and inspiration. I am so excited to be here sharing a simple and cute DIY Lace Tank Top Tutorial with you all today.

Fall is almost here and this DIY Lace Tank Top is perfect to pair with your favorite jacket, cardigan, jeans and a scarf. It’s pretty easy to put together and can be made with stuff you already have lying around the house! I used an old tank top and lace cut from a tablecloth I found at a second hand store.

SUPPLIES:
- White Tank Top (you can also use a regular t-shirt)
- Lace – (the amount you will need will vary, see tutorial for details)
- Sewing Machine
- Matching thread
- Other: Pins/scissors/disappearing ink pen/ruler
INSTRUCTIONS:
1. First measure your lace width. Mine was about 3-1/2” wide.

2. If your lace is from a tablecloth, cut it off at the top edge.

3. Now use your ruler and invisible ink pen to draw a straight line from one side of the front of your tank top to the other, starting at the bottom. You want your lace to overlap slightly so subtract 1” from your lace measurement and that is where your line will be. For me this was 2-1/2”.

4. Continue to mark your shirt all the way up till you almost reach the top of your neckline. (mine were 2-1/2″ apart) If you are buying lace and know the width already you can measure about how much you will need by measuring these lines and adding them all together, don’t forget to add extra for the top row as well.

5. Starting at the bottom of the tank, add your first layer of lace. Pin along the side edge of the lace and shirt and the top edge of the lace along your drawn line, all the way to the other side of your shirt. Leave a little extra lace on one edge in case your shirt stretches a little while sewing.


6. Sew along your lace edge starting at one side, sewing along the top edge and down the other side. Backstitching at beginning and end, removing pins as you go. *To turn a corner while sewing just stop at the corner with needle down in fabric then lift your presser foot up while you rotate the fabric and line it up the new direction you wish to go. Then put your presser foot back down and continue sewing.

7. Follow steps 5 and 6 for each layer of lace until you get to the top. The bottom edge of each new layer should overlap the previous layer slightly.

8. Your last layer will be slightly different. You want to start out by placing your lace face up along the scoop of your neckline. Pin in place where the lace touches the tank top.

9. Sew about 1/4″ from the edge of the lace, sewing from one armhole, below the neckline, to the other armhole. Then lay the lace back down and press if necessary.

10. Finally, pin your lace down along the armhole and side and then top stitch in place. Trim the excess lace once done.


Now you’ve got the perfect lace tank top to add to your Fall Wardrobe and it won’t break the bank!


I’m so grateful to have been able to share this fun tutorial with you all here on U Create! If you loved this tutorial you can find more like it (and other fun crafts) over on my blog eatpraycreate.com.


-Taya


So I have 3 girls and this tutorial will come in so handy for all of their ages…mine too!
Thank you so much for sharing your creativity with us today Taya!
Oooooooh! I love this! Such a cute girly look!
Thanks Becky! It’s perfect to pair with your favorite jeans and a cardigan this Fall!
Thanks Kari for allowing me to share some creativity with your readers! It is so fun to be guest posting on U-Create today!!
very cute DIY idea ! thanks for sharing 🙂
Lots of adorable things you make and share with all. But I really love the lace T-shirt I’m going to give a try cant wait to wear it this fall. Thanks to you and your sisters ideas.
Sincerely another crafter just for fun.